- Home
- -
- Linear Regression
Algorithm Implementation


This is the process of how I implemented a linear regression algorithm from scratch, how I created the coefficient function, and how I created the R-square function. You may wonder why I didn't just import the algorithm from scikit-learn directly. The main reason is that as a data scientist, you not only need to know how to implement a model, but also you have to know the algorithm inside of your model so that you can create a better model.
Linear regression is the simplest machine learning algorithm. It’s so easy that most people don't even realize it’s a machine learning algorithm. It’s just Y = mX+b and you only need to write a few lines of code to implement a linear regression model to your dataset. By implementing a machine learning model, you could easily get a 90% or 95% accuracy by just using the default values. However, sometimes a 99.999% model is not accurate enough like the self-driving car. As a data scientist, I really need to focus on the root cause of an algorithm, so that I can push the limits of my models.
Here are the steps:
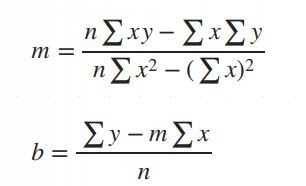
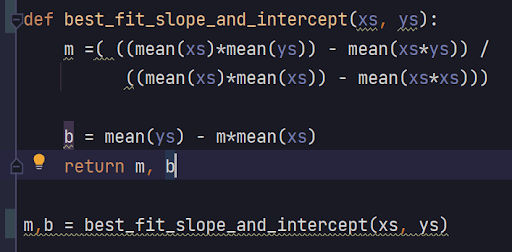
1. Create a function and implement the linear regression formula.
Define the m and b in Python
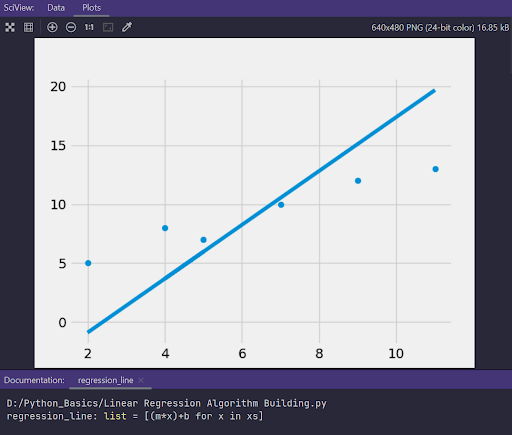
2. Test the linear regression function by using some sample data. The data type is float64 and use matplotlib to plot the line and testing data.
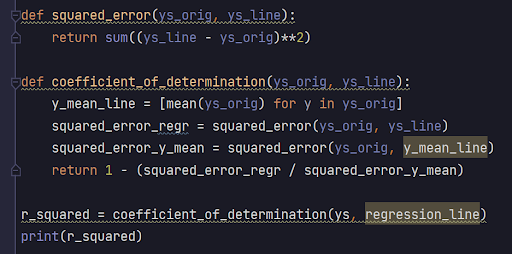
3. Create a function and implement the R-squared formula.
Define R-squared in Python.
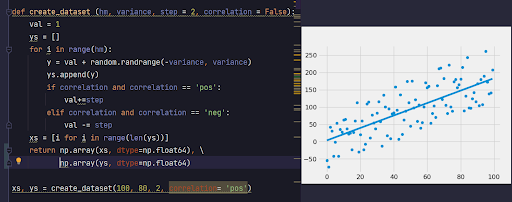
4. Create a dataset function to test if our R-squared is correct or not.
Technically, if you change the correlation in the function to positive, it should be positively correlated. If you change the correlation to False, it should be no correlation. If you change the variance to a large number, your R-squared should be smaller. If you change the variance to a smaller number, your R-squared should be close to 1. This process is very similar to unit testing. You always want to test your function and make sure it’s correct.
Software used: Python, Pycharm, Git
Packages used: statistics, numpy, random, matplotlib
Click the "Code" button to see the code of this project
Wechat ID:
jasonfangmagic